
Continuing my experiments with and learning more about working with bronze, I had a go at etching some bronze sheet last week. It came out really well and behaved very similarly to copper. The only difference was it took slightly longer to etch than copper - about an hour and 45 minutes compared to 30 to 40 minutes with copper.

The design stamped on the bronze sheet.

The results of the etching after the first rinse.

The etched sheet after removing the ink with nail varnish remover and giving it a scrub with steel wool.
So the next step was to make something with the etched bronze sheet!
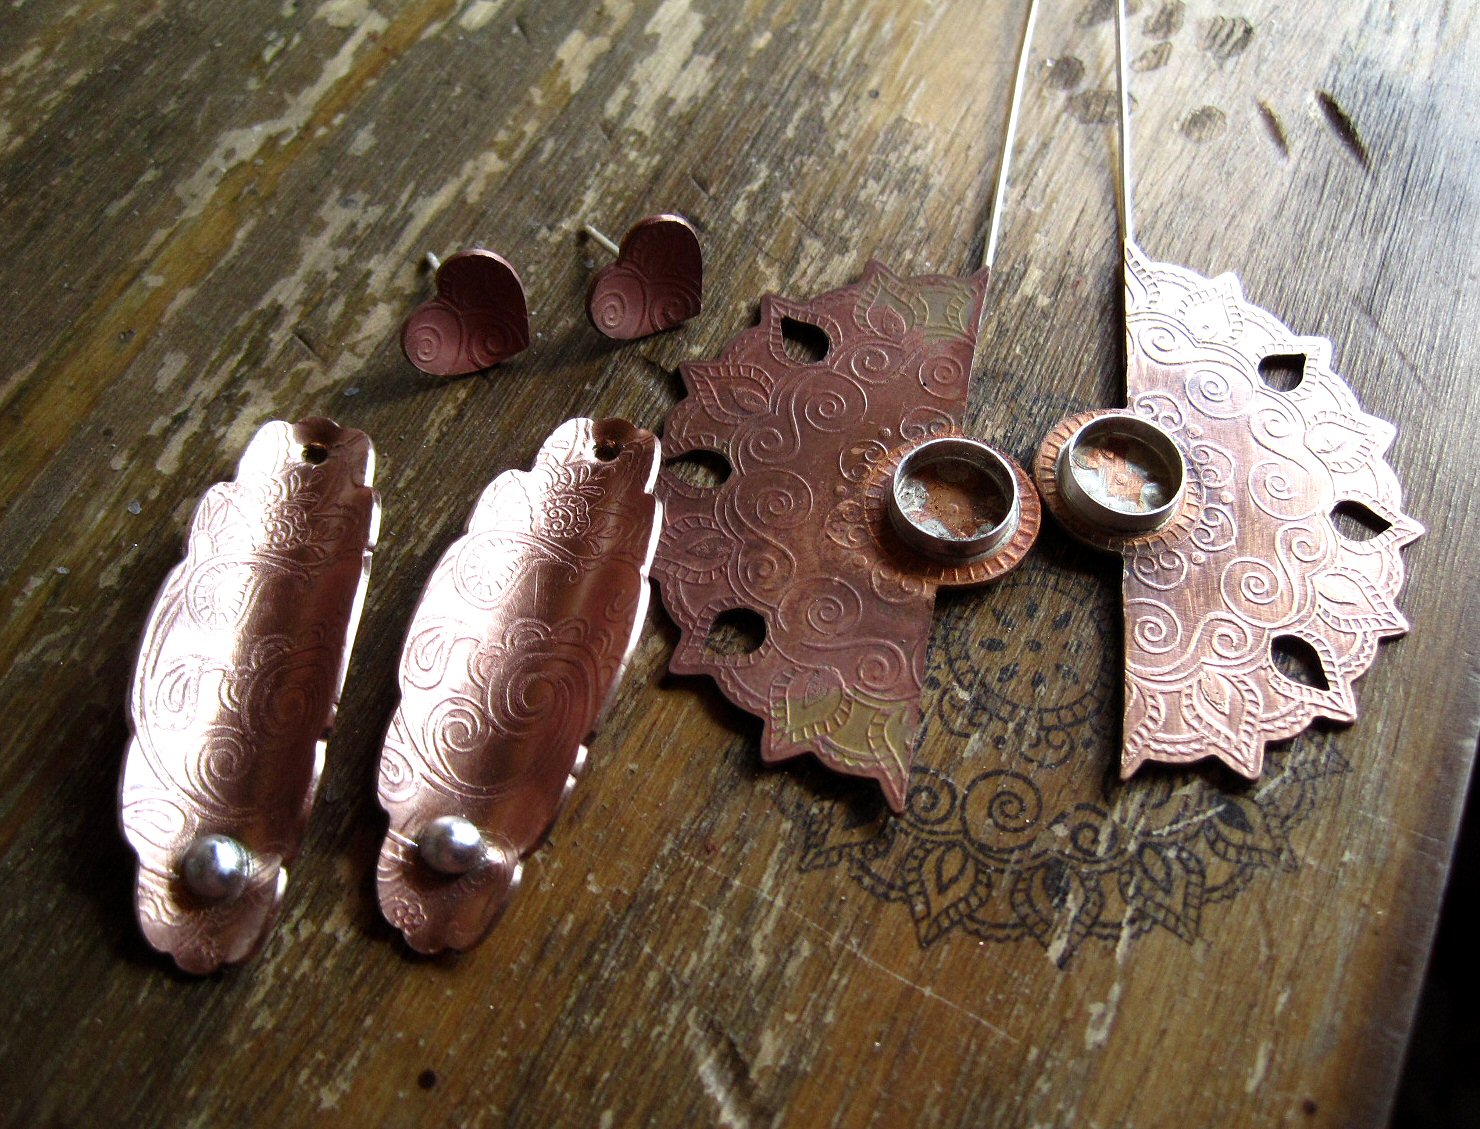
Heating and pickling bronze results in it being covered with layer of copper. I'm not sure if this occurs due to heat from the torch during annealing/soldering or if it's the result of the bronze going into the pickle {maybe someone will tell me} but the bronze has a definite copper hue after it's taken out of the pickle as you can see in this photo.
Luckily someone commented on one of my previous posts about bronze findings with the answer to this problem. Thank you Nana Louise!
Soaking the bronze in a mix of hydrogen peroxide and white vinegar - I used a 3:1 mix - for about 20 to 30 minutes then rinsing in white vinegar gets rid of the copper plating and restores the natural bronze colour.

Bubbles form on the bronze while it soaks in the hydrogen peroxide and white vinegar mix. Small brown patches appear on the metal as it cleans which can be removed by then soaking the bronze in white vinegar.

Restored to a nice bronze colour although the heart studs and curved earrings probably could have done with a bit longer in the "super" pickle.
After rinsing in water I cleaned the bronze earrings with steel wool which is my medium of choice when it comes to cleaning metal that's just been pickled. I find I can see the state of the metal better that way. I washed the earrings with washing up liquid and water to make sure they were grease free then I oxidized them in LOS.
The finished earrings.

Etched bronze heart studs

Curved scalloped edge bronze earrings

Malachite and etched bronze earrings
I'm in a quandry about this pair as you can see they don't hang totally vertically. They must be bottom-heavy {I know that feeling!} which I didn't consider when I came up with the design. I think they look ok and when worn aren't going to look too strange but part of me wants to cut them down to a wedge shape and add an earwire to the middle pierced hole so they hang with the malachite cab at the bottom....which would be a shame in a way but would satisfy the neat-freak perfectionist part of my brain.
So will I chop them down or won't I?
To be decided......
☺

ABSOLUTELY MARVELOUS !!!!!!
ReplyDeleteThanks Deborah :D
DeleteI think the design is so good that they'd work on their 'side' and I think, if it was me, I'd be tempted to have them hang that way too... but, having said that, the way they are now means someone could wear them facing 'forwards' or 'backwards' which would give some variety... I look forward to finding out what you decide to do and am enjoying learning about bronze through your posts :)
ReplyDeleteThanks Mossy, I still haven't decided what to do with them.....:D
DeleteYou are doing amazing work with the bronze Tracy! I actually like the way the earrings hang because they will frame a face more. :)
ReplyDeleteThanks Val, you could be right there!
DeleteThey are gorgeous! Love the pattern. :)
ReplyDeleteThanks May!
DeleteFantastici!!! Mi piace seguire i tuoi sviluppi con il bronzo! Posso chiederti dove hai acquistato i timbri del disegno, sono favolosi!!!
ReplyDeleteThanks Monica. I got the stamps from Sticky Tiger - http://www.stickytiger.co.uk/
DeleteSuch unusual earrings.
ReplyDeleteThey remind me of something you might see in paintings of Cleopatra.
Heather :)
Thanks for your comment Heather. They are a bit different shape-wise to stuff I've done before :D
DeleteThose malachite earrings are gorgeous! I actually had similar "accident" with my newest earrings. They don't have any stone in them, but the design alone means they aren't balanced, so they hang very similarly to yours. Well, we learn something new every day, like taking how the design may affect behaviour of finished piece into consideration! That said, I rather like the way they hang :)
ReplyDeleteThanks Kasia! How things are going to hang is something I will now think about more before trying a new design! I think I am going to "re-design" the malachite pair....
DeleteAre they too wide to be turned 45 degrees and hang the ear wire just above the cab? Then they wouldn't have to be cut down.
ReplyDeleteThanks for your comment Cynthia. I did think of doing them that way but they are a bit wide plus I can't do anymore soldering now the stone is set.
Deletehello! It is absolutely amazing! Could you tell what the thickness of metal?
ReplyDeleteHi Irina,
DeleteI used 0.7mm bronze sheet. It was pretty hard to find in the UK to be honest :D
Thank you very much! I understand you very much, because I'm still looking for this thickness in Russia :D
DeleteHello. Could you please tell, which instrument do you use to stamp the metall? Is stamp stand unharmed after it?
ReplyDeleteHi, I use a rubber stamp with ink to stamp the design on the bronze then soak the metal in ferric chloride to etch it. The ink acts as a resist to produce the pattern.
DeleteWhich ink do you use?
DeleteI use StazOn ink. Any colour will work as far as I know :D
Delete