
Finally! I'm Happy With My Photos!

After much experimentation : white backgrounds, bright backgrounds, subtle backgrounds and many visits to my local ESK to buy far too many scrapbook sheets and different coloured paper, I've finally found a background that I'm happy with! And I had it at home all along.

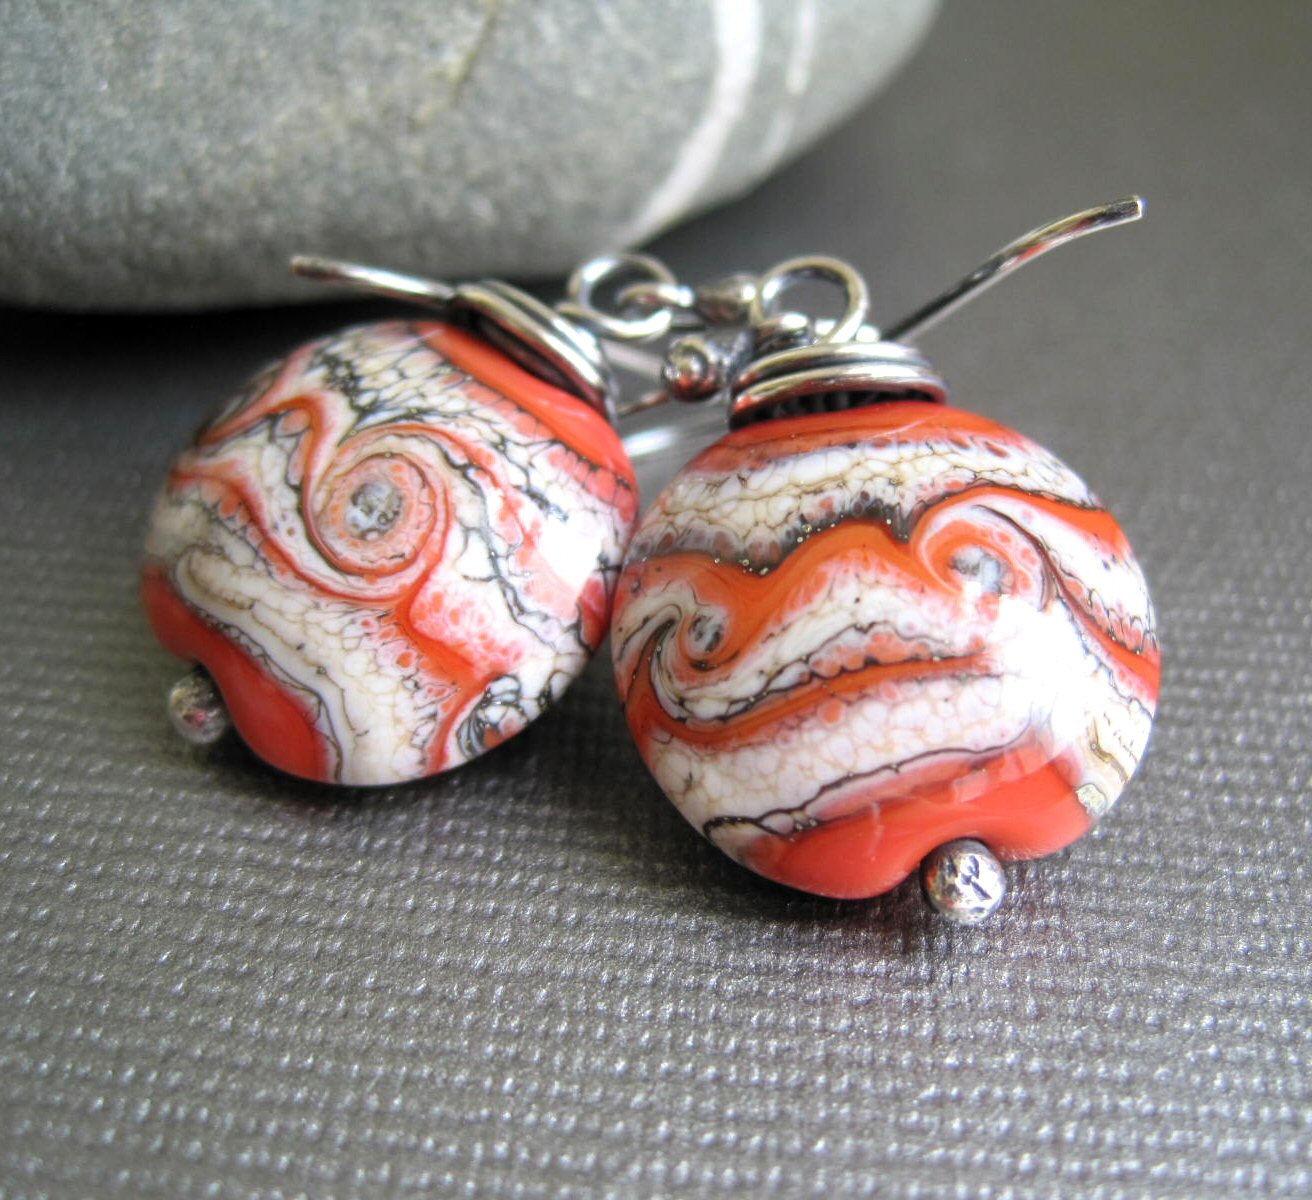
I've started using the back cover of an old Reader's Digest Univeral Dictionary - a sort of silvery~grey colour which I think works ok. I know lots of people prefer a plain white background for jewellery but I found I got a lot of glare from the white especially with silver jewellery and it sometimes looked a bit off white. I think the grey sets off the colours of the beads well and makes them pop and I haven't had to edit the photos as much which saves time.


I've also started using a mini tripod I bought from eBay a few years ago which was immediately shoved into a draw when it arrived. I took one look at it and thought I just couldn't be bothered faffing about with it but I've now started using it together with the timer on my camera so I don't have to worry about having the shakes when I'm taking photos. Those photography guides do make sense after all!


Now I just have to find something I'm happy with for my copper jewellery as the grey is a bit dark for it sometimes depending on the colour of the beads. If any of you have any tips for backgrounds for copper jewellery I would be very grateful!


Comments

  1. The photos look great, and really show off your gorgeous work. I'm pleased you've found your perfect background :)

    ReplyDelete
  2. I really like it! Nice to have a bit of texture but doesn't take focus away from the jewellery. Love the red-orange white swirly beads!

    ReplyDelete
  3. Very impressive, I like it! I think it suits your work perfectly and you don't see many jewellery pieces photographed like that.

    ReplyDelete
  4. Well done- they look fantastic! It was worth all that searching for the perfect background.

    ReplyDelete
  5. Your photos look gorgeous! I know how hard it is to photograph silver and it looks like you've cracked it! Really beautiful!

    ReplyDelete
  6. Your photgraphy is excellent...and I agree, it sure can be tricky with silver wire sometimes with silver wire especially. I absolutely love your wirework too! :-)

    ReplyDelete
  7. Great idea and great pics. I'm going to take a new look at my old books.

    ReplyDelete

Post a Comment

Your comments and questions are very welcome!
If you would prefer to contact me directly please use the contact form on my "get in touch" page.

Popular posts from this blog

Combining Soldering And Enamel

The need to make cute, brightly coloured enamel studs propelled me into the world of combining soldering with enamel a couple of years ago. I knew from reading up on it that it was possible to enamel and solder on the same piece but wasn't too confident I was able to do it back then. It was a slightly embarrassing occurance that made me just get on with - I'd made some enamel studs with glued on stud posts. I'd used 2 part epoxy resin which was a job in itself as it set hard after 5 minutes so I had to keep mixing more up. The finished studs looked ok but that little voice in my head kept asking "are you sure you want to use glue?" I wasn't but didn't think I had any other way to do it so I used glue. I sold my first pair and merrily sent them on their way to Canada. A couple of week later the buyer got in touch to say the stud post had come off one of the earrings and the other was hanging off. I was mortified, apologized profusely and refunded her m

Etching Silver Using Nail Art Stamps

So my love/hate relationship with etching sterling silver continues. I've tried a few times now and always end up with different results most of them not that great to be honest. I've tried connecting the silver and a piece of copper to a 9v battery and also heating the ferric nitrate. Sometimes the results are good sometimes not so good. I currently have an etched piece of silver sheet waiting to be reticulated and rid it of the mess that is the etched "pattern".  I now know that using stamps and Stayz On ink just doesn't work with silver - the time needed to etch using ferric nitrate is much longer than etching copper and the ink starts to wear away after about an hour. This results in the pattern being patchy as the resist is eaten away and the silver ends up quite lumpy and course looking. I have yet to try using pnp paper. I don't know why but it all seems a bit of a faff to do. I don't have a laser printer so would need to find somewhere or

Embossing Metal With My Sizzix Bigshot

I must admit up until a few weeks ago I was vaguely familiar with the name Sizzix but as to what you actually did with a "Sizzix" I was completely in the dark! That was until I stumbled across a video from Vintaj showing how you could use their embossing folders with a Bigshot to create designs on metal ("metal" - my favourite word after chocolate!) I was really impressed and itching to have a go, I just needed a Bigshot........ I waited a few weeks then when the urge to possess one overcame me I went out debit card at the ready..............and the shop had sold out! So I trundled off to The Range on the off chance and came home clutching my own surprisingly heavy pink and black wonder machine. It sat on the dining room table for a couple of days while I waited for the embossing folders I'd ordered online to arrive then the time came to start playing! I started with some pre-cut 24g copper hearts and the Wildflower Vines and the Butterfly Swirls Deco