
The need to make cute, brightly coloured enamel studs propelled me into the world of combining soldering with enamel a couple of years ago. I knew from reading up on it that it was possible to enamel and solder on the same piece but wasn't too confident I was able to do it back then.
It was a slightly embarrassing occurance that made me just get on with - I'd made some enamel studs with glued on stud posts. I'd used 2 part epoxy resin which was a job in itself as it set hard after 5 minutes so I had to keep mixing more up. The finished studs looked ok but that little voice in my head kept asking "are you sure you want to use glue?" I wasn't but didn't think I had any other way to do it so I used glue. I sold my first pair and merrily sent them on their way to Canada. A couple of week later the buyer got in touch to say the stud post had come off one of the earrings and the other was hanging off. I was mortified, apologized profusely and refunded her money immediately. Luckily she was understanding about it but I felt awful! I hadn't packed the studs well enough in the first place to withstand a trip to New Brunswick but it was the glue spectre that was haunting me the most.
I decided then I had to teach myself to solder posts onto stud earrings and to learn to combine soldering and enamel. My first attempts weren't great and involved the melting of a few stud posts, lots of sweating due to concentrating so hard and some swearing. I tried enamelling just one side of a disc and then soldering the post on last but that didn't work for me, I just ruined the enamel with the heat from the torch. I almost gave up on it but I hate to admit defeat and I got there eventually using enamel solder also called IT solder. Enamel solder flows at a higher temperature than enamel (and hard solder) so it can be used before enamelling and won't reflow when the enamel is fired.
I have used it to torch fire small enamel stud earrings with great success. The two fears I had before I did it the first time - will the solder react with the enamel (or vice versa) and mess it up and will I melt the sterling post when I'm firing the front of the earrings didn't happen and I've gone on to make several pairs to date. The latest were three pairs of enamel heart studs I made last week.


I took photos as I was soldering and enamelling the heart studs which I hope might be useful!
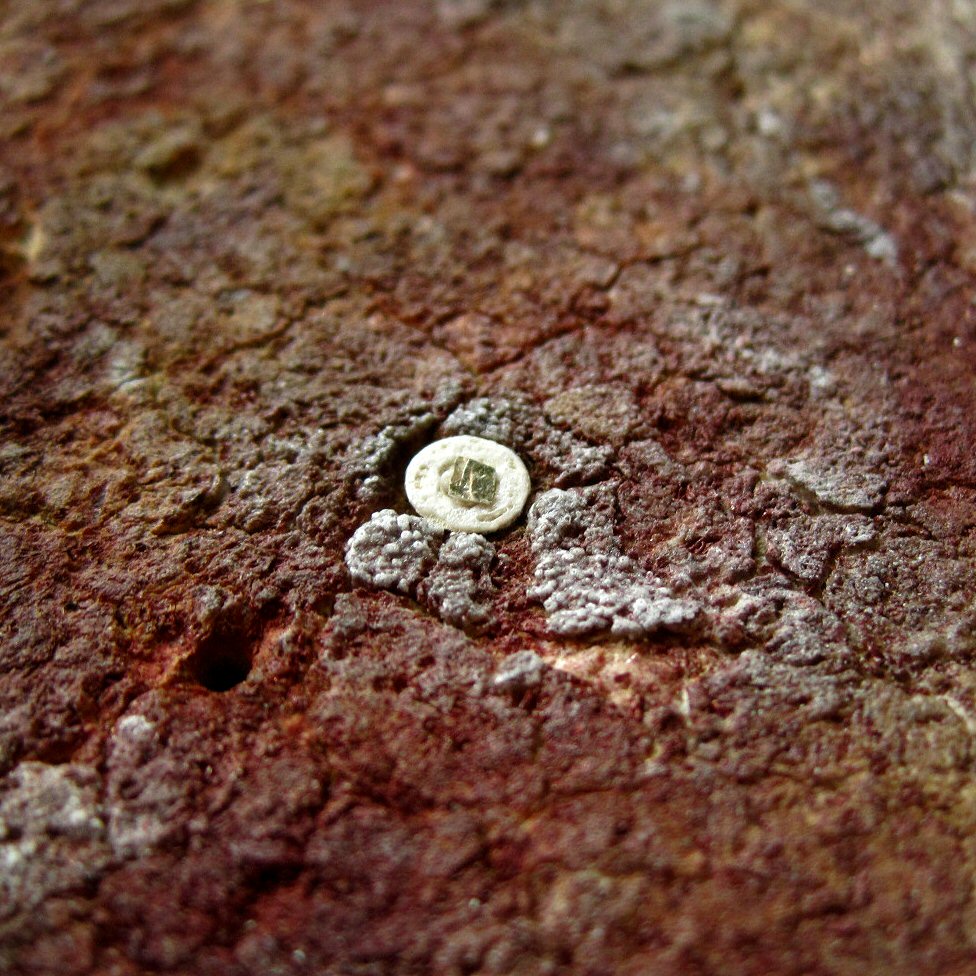

1. First I flowed some enamel solder onto the pad of the stud fitting. I prefer to use these as my hand isn't steady enough to hold a post and solder it in place and the pads mean you can sit the fitting onto the back of the earring and it will stay put as you solder. I made holes in my solder block for the pad and post to sit in to keep them level.
2. Copper hearts just out of the pickle ready for soldering.
2. Copper hearts just out of the pickle ready for soldering.


3.The first four soldered together
4. In the pickle to clean (dirty pickle!)


5. Counter enamel sifted onto the back of one of the studs and placed on the trivet ready for torch firing. You can see the trivet is sat precariously near the edge of my soldering block (which is sat on top of an empty tin can) so that I could get the torch under it. I've since bought a tripod and wire mesh to sit the trivet on which will make it much easier to get right underneath with the torch.
6. The counter enamel finished on all six earrings. I fired it to roughly orange peel stage as it will be in direct contact with the flame when the front is fired and will smooth out nicely then.


7. Enamel sifted onto the front. I always balance/hold the copper piece in my fingers when I sift the enamel as I find it easier but flat pieces can be set onto bottle tops if preferred.
8. Not the best photo but hopefully you can see the stud set onto the trivet with the post sitting in the gap at the centre. The small gap where the three legs meet is very handy for this and helps protect the silver post from the heat of the torch. I place it there by gripping the top of the post with tweezers right underneath the earring and carefully setting it in the centre of the trivet so the post fits in the gap.


10. Another layer and a sprinkle of transparent on top and they are finished! Some people enamel just the front and solder a post to the back with easy solder to finish. It seems to work for them but I found it either ruined the enamel or the enamel cracked so I prefer to do it the hard (right?!) way!

Just delurking to tell you how cute these are! :)
ReplyDeleteThanks May!
ReplyDeleteI love them! I am yet to attempt soldering posts on first because of the fear of melting the posts whilst enamelling! I've got the Eutectic solder, so I should probably just give it a go....
ReplyDeleteThanks for the tips on soldering and enameling, I've been wondering about that. These are very cute!
ReplyDeleteYes give it a go Em! As long as you use a fairly small torch (mini or max flame butane) and keep it moving it will be fine.
ReplyDeleteI've just done some enamelling using a tripod and wire mesh and it was much easier than how I've been doing it so far. I cut a square out of the mesh in the middle under where the trivet sits to cut down on it being a heat sink and it worked great. I used a mixture of a mini butane and max flame torch depending on the size of the metal piece.
I have spent HOURS today searching the internet on how to solder and enamel...THANK YOU SO MUCH! I have looked and looked!
ReplyDeleteYou're welcome Keri Lee :D
ReplyDeleteThis is about the best explanation of how you CAN solder posts and still work the enamel layers! I have lots of experience in metalwork and soldering is not a problem in any other area but I'm new to enamel and use the torch method exclusively for now. Talk about frustrating! I have a lot of melted silver stuck to enamel bits - grrrrrr. I have tried extra easy solder but will definitely put IT on my list for ordering. I can't thank you enough for this 'uplifting' post!
ReplyDeletebest :: lynn
Thanks Lynn, I'm glad it's helped!
ReplyDeletethank you for all your tutorials! i am just starting out and i always reference your blog. you are a great teacher
ReplyDeleteThanks for your comment Marie, I'm glad my posts are useful!
DeleteA really good tutorial! thank you!! will this work if I enamel my pieces in a kiln? I was wondering, how do you manage to enamel both sides using a torch? I tried this but when I put the flame on the back of my piece to heat up the enamel on the front, the enamel on the back didn't look great because of the flame contact.
ReplyDeleteThanks Laura. I've never used a kiln for enamelling but I think it would work ok with a post soldered onto an earring. You might need to keep an eye on it and take it our as soon as it's "done" though.
DeleteI always use black as the counter enamel. The effects of the direct heat from the torch on the black counter enamel when you fire the front isn't as obvious as it would be if you used a light colour. It can go a bit smoky grey looking or sometimes get a slight rainbow sheen to it but it looks ok.
Hi
ReplyDeleteHow are you pickling/cleaning between firings? I have tried this, but the pickle always etches away at the enamel.
Hi Dale,
DeleteIf you use Thompsons enamels you shouldn't have a problem with the enamel being affected by the pickle.
The only time I've had a problem with pickle eating away at enamel was when I used the Soyer brand of enamels.
Wow thank you so much for this post. I love the suggestion to use the trivet hole to protect the post. I have purchased many books on the subject and this is the first. Can't wait to try. Susan of susanbcreations.com
ReplyDeleteThanks for your comment Susan. I'm glad it's helped :D
DeleteThanks so much for sharing. I had a question, a generous stranger answered it. I love the internet. And your work. Love that too. Going to copy!
ReplyDeleteThank you, I'm glad it was useful!
DeleteHello, I am a jeweller and have been making for 30 years now. I teach and have bought a kiln and lots of enamels, sieves
ReplyDeleteetc. I have IT solder and I tried to solder and enamel. I domed fine silver, used IT solder etc dusted the enamel and fired it once. The solder went black and appeared to look as if it reflowed. It was very messy looking, it has happened this way a few times and I'm loathe to keep wasting silver. I have sought the help of a professional who seems unwilling to guide me. I am so glad to have found your blog, your willingness to share your knowledge is wonderful. I too discovered pickle eats the enamel, but its hot pickle that does it I think? Any advice is great Thanks.
Hi Tracy, thanks for your comment.
DeleteI recently bought a kiln but haven't tried enamelling anything with a solder join yet. With something as small as studs I'd probably stick to using a torch as it's more controllable. The studs I make are enamelled on the back too and I use the posts with a pad so the solder is protected with the silver pad part and the counter enamel when you fire. Whatever goes on with the solder under that when it's fired with a torch I can't see, but they have worked ok so far.
You could try practising with copper sheet and wire to make the studs and posts to try and work out how long to fire for. You can also get low firing temperature enamels. Vitrum Signum sell Schauer enamels that fire between 700°C - 730°C that might work better with the IT.
I have found that Thompson enamels are ok in pickle. I had a problem with some Soyer enamels in pickle but I stopped using them as they have a high firing temp which doesn't work well when you use a torch.
I'm finding enamelling with a kiln is a steep learning curve compared to using a torch and I'm definitely finding out what not to do in it!
Thanks Tracy, I am trying to make enamel post earrings and FAILING at it miserably. Reading your post has given me some ideas. :) Hope all is well. It has been awhile. xoxo
ReplyDeleteHi, where can I buy IT solder in the UK please? Thanks in advance
ReplyDeleteHi, You can get it at bettsmetalsales.com
DeleteThanks for the info - I've had luck with soldering after enameling by grinding out a spot (or keeping a clean spot) for the solder area. Question for you - you mention 'enamel solder'. IS there such a thing or was that just a general comment? Thanks!
ReplyDeleteThanks for your comment.
DeleteYes you can get enamel solder, sometimes called IT solder or eutectic solder. It flows at a higher temperature than enamel fires at so is useful for using on enamelled pieces.
Hi Tracy. Love your blog, its hard to find information on enameling so I was very happy to discover Cinnamon. I have a kiln and I just wondered if you had had the chance yet to solder and enamel earrings in your kiln and how you got on. I tried it with eutectic solder but the post just melted and collapsed sideways. Any help would be appreciated!
ReplyDeleteHi Harriet, thanks for your comment!
DeleteI haven't tried enamelling anything in my kiln that has been soldered. The studs are so small that I think you would need to watch them like a hawk to prevent the posts melting. Maybe something a bit bigger would be easier. I do think using a small torch is better for enamelling small items - easier to control and much less stress :)
Hi there! I saw this blog ages ago and never attempted it. But the time has come and I have a question please. Dont the posts get annealed when you fire the enamel? and if it does, how do you harden them again please? Hoping you are still out there!! TIA. Lisa
ReplyDeleteHi Lisa,
DeleteThanks for your comment. I replied ages ago but it didn't post for some reason.
The posts may be annealed slightly but because they sit inside the gap at the centre of the trivet they are protected from the heat. I haven't ever noticed the posts being too bendy when I've made these studs.
There is a standard method for work-hardening posts. You hold the earring "head" in one hand, grasp the end of the earwire with pliers and turn it 180 degrees. It straightens and hardens the post. Plus, if your earwire is going to come off, it will do so now, before the customer sees it. Better sooner than later!
DeleteI am grateful for your tutorial and "fingers crossed" for trying this work! Lily Winter
Hi, Thanks for the demo on soldering post to earrings w enamel!! I wondered why posts were sold with a pad before, now I can see the benefit of it!!
ReplyDelete