
I decided recently that etching is one of my favourite things to do with metal. I read about it online quite a while ago and immediately thought it looked cool but the thought of using an "acid" and having to find somewhere to store it (a perennial problem when you don't have a workroom) put me off. So instead I admired etched copper from afar. Until I got a bee in my bonnet about it again and bought Lexi Erikson's copper etching dvd.
Lexi Erikson is very good at explaining jewellery techniques and making them seem much more straightforward than they first appear. I already knew that ferric chloride was a salt and not an acid so wouldn't eat my flesh through to the bone if I accidently spilled some on my hand. The dvd made me feel much more comfortable about having a go so I ordered some ferric chloride from ebay and bought some stamps and StazOn ink from a local craft shop. My first attempt went ok but for some reason I left the copper to etch for an hour and a half without checking it at all. Don't ask me why I did that, I have no idea! The copper etched ok but a really deep etch that left it looking a bit chewed up and rough around the edges. Having learned my lesson I had another go and got much better results the second time.
These photos are from a recent etching session. Please note this isn't strictly a tutorial and I would recommend reading up on copper etching with ferric chloride in order to do it safely and learn what you can and can't tip down the drain!

Ferric Chloride in my glass etching dish, never to be used for cottage pie again!
I pour it back into the bottle when I've finished etching. It will eventually lose it's power and need to be replaced. When that happens I will need to ring the council and find out where to take the spent ferric chloride as it is classed as hazardous waste and cannot be tipped down the drain.
I pour it back into the bottle when I've finished etching. It will eventually lose it's power and need to be replaced. When that happens I will need to ring the council and find out where to take the spent ferric chloride as it is classed as hazardous waste and cannot be tipped down the drain.

Some very cute Dovecraft mini letter stamps I found at The Range for 99p! They were available in other fonts too but I chose this one mainly for the heart (at the top next to the e). As you can see I don't do keeping things in order!
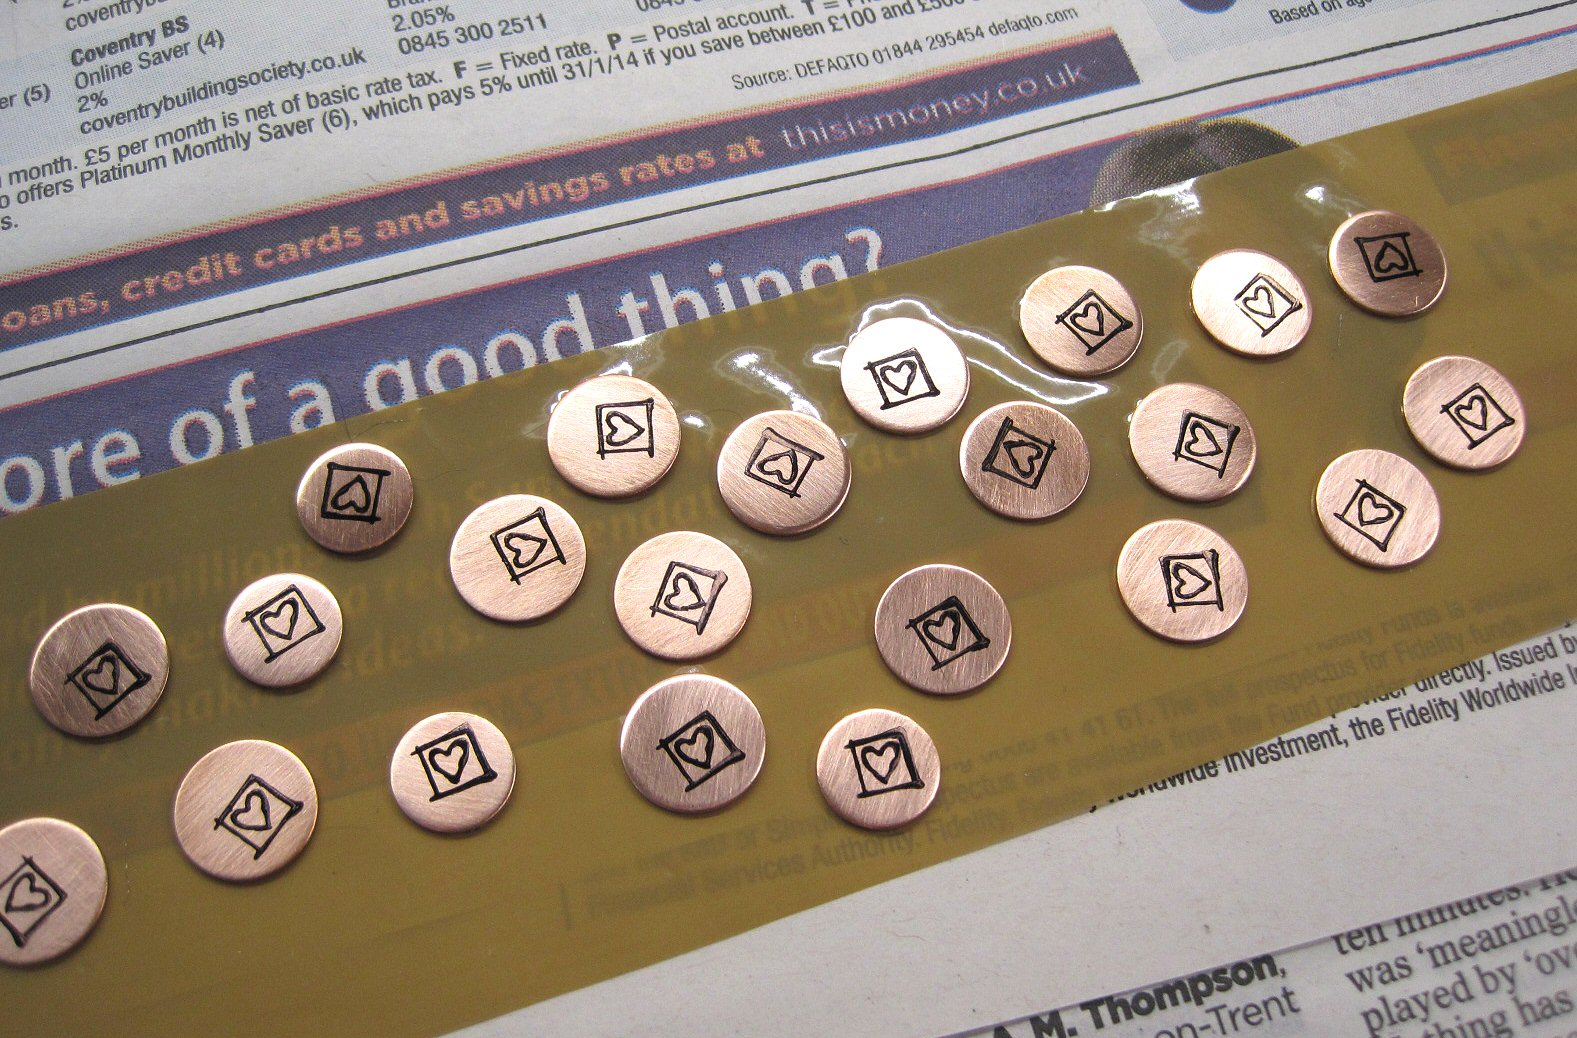
Copper discs stamped with StazOn ink and the heart stamp. They're stuck to the packing tape ready for suspending in the ferric chloride. Before stamping the design I cleaned the copper with wire wool to remove any grease from my fingers.

Copper washers stamped and ready for etching.

The small copper discs suspended upside down in the solution. This allows the copper etched away to fall to the bottom of the dish. Giving the dish a wiggle or stirring the ferric chloride occasionally will help to loosen the particles of copper from the surface of the discs. I normally leave it for about 30 minutes before checking the etch. I use a piece of copper wire and gently scratch the design to feel how deep the etch is. At the moment it takes about 30-40 mins to get the depth of etch I like. As the ferric chloride becomes contaminated with copper particles the etching time will increase.

When the etch is deep enough I remove the tape from the glass dish and dunk the lot in a water and baking soda solution. Then I remove the copper pieces from the tape and clean under the tap with a toothbrush. You can clean the ink and mustard coloured residue off with wire wool then I like to pickle them to make sure everything is properly clean.
I must admit I don't wear gloves to remove the tape from the glass dish as they stick to the tape and get annoying, but you may prefer to. I have got ferric chloride on my hands accidently and still have all my fingers but please remember chemicals need to be treated with respect.
I must admit I don't wear gloves to remove the tape from the glass dish as they stick to the tape and get annoying, but you may prefer to. I have got ferric chloride on my hands accidently and still have all my fingers but please remember chemicals need to be treated with respect.

A close-up of the etched discs, before and after cleaning.

I have no idea what I'm going to do with these larger pieces yet!
Below are some of the etched copper pieces turned into charms and earrings.

Copper studs

Etched copper washers with sodalite

Etched heart charms
Wow, bellissimi!!!!!!!!!!!!!!!!!
ReplyDeleteGrazie Monica!
ReplyDeleteJust lovely! Besides Stazon, I've discovered that nail polish is a great resist too. I have the kind with a really fine en-like tip. Then you can draw your own designs!
ReplyDeleteMore awesome work! I love the earrings studs. Working with acid would scare me too so I am glad you found an etching alternative!
ReplyDeleteOoooh this has just come at the right time - I'm planning on etching silver and using ferric chloride - still reading up before buying anything though to make sure I know it'll work. Your stuff looks gorgeous (as ever!)
ReplyDeleteThanks for your comments!
ReplyDeleteBecky - you'll need ferric nitrate for etching silver.You can etch silver with copper nitrate using a battery to create an electric current but I found the results were unpredictable.
I really like the effects you've been getting with your etching, and now you've given me a use for my old rubber stamps! (Card making got pushed aside when I discovered jewellery making).
ReplyDeleteYour posts on metal embossing with Sizzix have already got me trying that. Your instructions and photos are really inspiring, and your work is beautiful. I've been really into wirework, and was looking for ways to extend what I do. I'm really enjoying the embossing, and now can't wait to have a go at etching! (Didn't get on with the Sizzix etching dies.)
So, thank you! I shall keep reading your posts to see what you do next. :-)
-Kate.
Thank you Kate, I'm glad I've inspired you to try new things :D
ReplyDeleteYes, sorry I meant ferric nitrate (as opposed to the terrifying nitric acid) Sorry obviously had ferric chloride on the brain when I posted...
ReplyDeleteYou have such beautiful pieces! Have you ever tried this process: http://www.instructables.com/id/Stop-using-Ferric-Chloride-etchant!--A-better-etc/
ReplyDeleteI'm thinking of experimenting with it because it seems more sustainable. I would love to get your thoughts.
Thanks for your comment Amy. It does seem a cheaper alternative but you will still end up with copper particles in the etchant that will need to be disposed of properly (if I understood it right, it was a very long piece!)
Delete