
Nylon Dapping Block - Another Useful Tool


If you're like me and you love adding pattern and texture to your metal jewellery you've no doubt come up against the problem of forming a piece of metal with a pattern on it. In my case most of my forming involves using a dapping block or steel stakes. If you hit a piece of textured/patterned metal with a metal tool like a hammer or dapping punch the pattern will become flattened and spoilt. My previous method of stopping this from happening when I wanted to dome a patterned piece of metal would be to use leather to protect the pattern as in this photo...


As you can see the leather soon ends up looking a bit battered. It does work but one day when I was flitting about in internetland I came across a nylon doming block and it became a thing I needed to have. So after searching for quite a long time I discovered you can't get them in the UK. Hmm, no surprise there. I did manage to find one on Amazon from a US seller and for under £5 with postage also under £5 I went and ordered it. I did read the reviews which weren't great as the blocks are a bit rough but they didn't put me off as the price was fine and I have tools so I was pretty sure I could sort out any roughness and scratches on the nylon when the block arrived. I've since added my own 4 star review with a photo. By the way the link to Amazon is not affiliated - I'm just being helpful in case you wanted one too :)

The block arrived pretty quickly from the US which was good and from the top photo and the two below you can see it was a bit grubby and rough but nothing drastic that couldn't be sorted out.


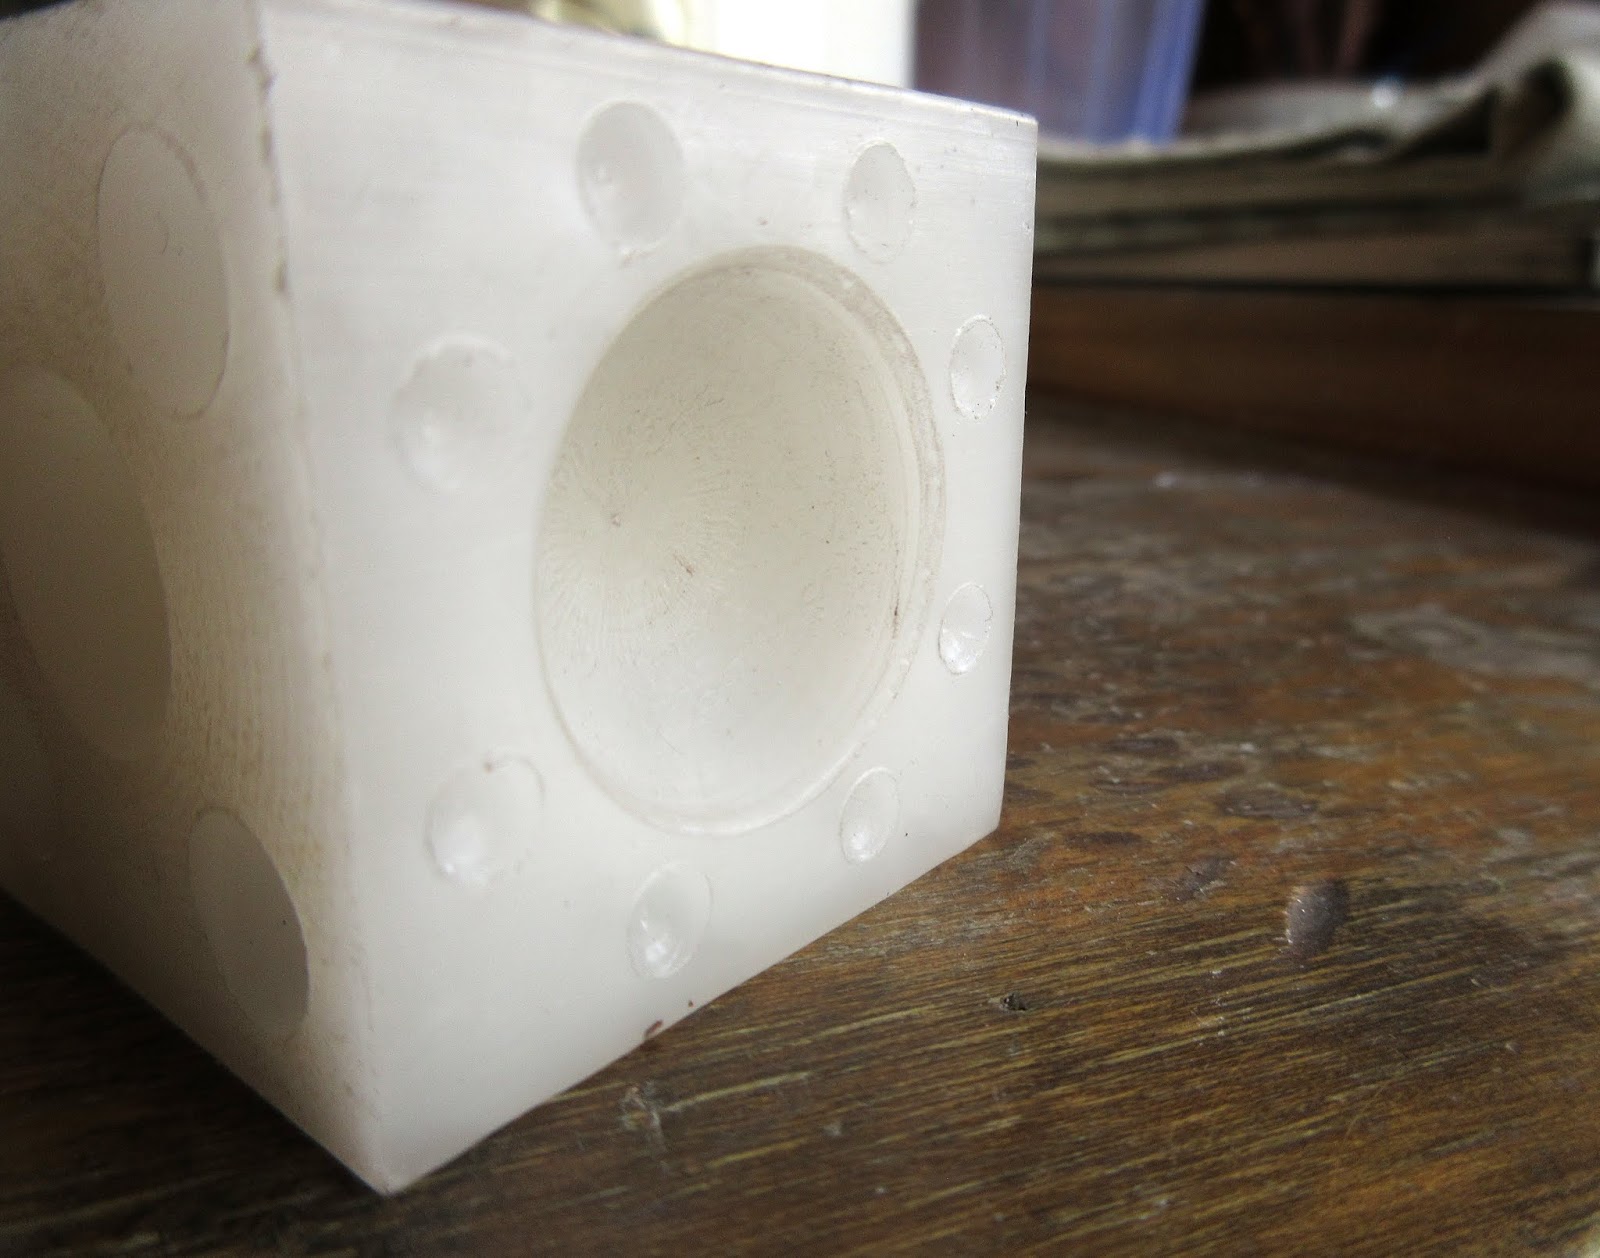
The very small depressions are most likely never going to be used but the block has enough useful sized depressions to make it worth getting.

The ridges and rough bits in the nylon were easy to tidy up using a radial polisher with my flexshaft. Don't get carried away though as it's easy to start wearing away too much of the nylon! If you don't have a flexshaft or Dremel you could tidy up the block with sandpaper


The photo below shows the depression after using the radial polisher on the right half. The ridge near the top was still there but a lot smoother and the roughness and scratches were virtually gone.


You could leave the block as it is if you didn't want to clean it up as the nylon is softer than metal so isn't going to transfer any marks anyway but I wanted to tidy up the depressions I was going to use.


I decided to try it out on a copper disc textured with a leaf skeleton.


The photo makes it looks like I've chosen a punch that is much too big for the size of the depression but it was the right size honestly :)


I then used a couple of smaller depressions and punches on the disc to give it more of a domed shape. Another useful thing with the nylon block is you can put the domed metal into a depression that is slightly too small and create a higher dome without having to worry about the dapping block leaving a ring around the metal piece which is what would happen with a steel dapping block. I tried this with the copper disc in a slightly too small depression and it did get stuck in the nylon block but came out after a few whacks on the punch none the worse for it.


I was pleased with the result and I will use the nylon block regularly.

So what about when you want the pattern on the inside {concave} side of the disc you are no doubt wondering? Nylon to the rescue again!


You can also get nylon dapping punches which are much easier to find in the UK. I've had a set of these for a few years and they are really useful to use with a steel dapping block when you want to protect the pattern on the inside of the domed metal. The photo just shows two but you buy them in a set of various sizes. I used a nylon punch on these copper star studs to give them a slight concave shape and the nylon doming block was used to give the bronze heart earrings a convex shape.


"I told you to write about fish that's why I'm staring at the wall. Your last post was like how many months ago?? There are many many fish - write about them all. I like fish."

Pixie helped in the writing of this post.

You've probably noticed I like writing things on bits of paper and various notepads. I just hope you can't read any of them :D

Comments

  1. Thank you so much for the very informative, creative and inspiring post. I have searched the internet and I'm having trouble locating a block made of nylon. Could you please share where you purchased yours?

    ReplyDelete
    Replies
    1. Thanks for your comment Jackie. You can find them on Amazon - the link in my post will take you to the listing. Cookson Gold in the UK also sell the nylon dapping set but it's expensive!

      Delete
  2. Oh wow, so much inspiration! Those are beautiful designs on the copper, can I ask how you achieved them?

    ReplyDelete
    Replies
    1. Hi Cassandra, Thanks for your comment. I used skeleton leaves and pattern sheets with a rolling mill.

      Delete

Post a Comment

Your comments and questions are very welcome!
If you would prefer to contact me directly please use the contact form on my "get in touch" page.

Popular posts from this blog

Combining Soldering And Enamel

The need to make cute, brightly coloured enamel studs propelled me into the world of combining soldering with enamel a couple of years ago. I knew from reading up on it that it was possible to enamel and solder on the same piece but wasn't too confident I was able to do it back then. It was a slightly embarrassing occurance that made me just get on with - I'd made some enamel studs with glued on stud posts. I'd used 2 part epoxy resin which was a job in itself as it set hard after 5 minutes so I had to keep mixing more up. The finished studs looked ok but that little voice in my head kept asking "are you sure you want to use glue?" I wasn't but didn't think I had any other way to do it so I used glue. I sold my first pair and merrily sent them on their way to Canada. A couple of week later the buyer got in touch to say the stud post had come off one of the earrings and the other was hanging off. I was mortified, apologized profusely and refunded her m

Etching Silver Using Nail Art Stamps

So my love/hate relationship with etching sterling silver continues. I've tried a few times now and always end up with different results most of them not that great to be honest. I've tried connecting the silver and a piece of copper to a 9v battery and also heating the ferric nitrate. Sometimes the results are good sometimes not so good. I currently have an etched piece of silver sheet waiting to be reticulated and rid it of the mess that is the etched "pattern".  I now know that using stamps and Stayz On ink just doesn't work with silver - the time needed to etch using ferric nitrate is much longer than etching copper and the ink starts to wear away after about an hour. This results in the pattern being patchy as the resist is eaten away and the silver ends up quite lumpy and course looking. I have yet to try using pnp paper. I don't know why but it all seems a bit of a faff to do. I don't have a laser printer so would need to find somewhere or

Embossing Metal With My Sizzix Bigshot

I must admit up until a few weeks ago I was vaguely familiar with the name Sizzix but as to what you actually did with a "Sizzix" I was completely in the dark! That was until I stumbled across a video from Vintaj showing how you could use their embossing folders with a Bigshot to create designs on metal ("metal" - my favourite word after chocolate!) I was really impressed and itching to have a go, I just needed a Bigshot........ I waited a few weeks then when the urge to possess one overcame me I went out debit card at the ready..............and the shop had sold out! So I trundled off to The Range on the off chance and came home clutching my own surprisingly heavy pink and black wonder machine. It sat on the dining room table for a couple of days while I waited for the embossing folders I'd ordered online to arrive then the time came to start playing! I started with some pre-cut 24g copper hearts and the Wildflower Vines and the Butterfly Swirls Deco