
I've been playing with my enamel colours again and creating my own "blends". It's fun sitting at the table with my different colours and mixing them up to make new ones. Enamels don't really mix to make new colours but you can achieve some really pretty speckly effects. Using the same colour groups work better than mixing colours opposite each other on the colour wheel. I found this out when I mixed some purple and lavender enamels with a bright green hoping I'd get a nice purple/green mix but it just looked grey when it was fired. If you looked closely you could see the individual colours but the overall effect was dull but luckily the beauty of enamelling is you can fix it with another layer (within reason!) What I have learned with mixing colours is if it looks dull in the pot it will still look dull when it's fired........... :D
The hoops above are enamelled in a mix of different greens with some transparent turquoise layered on top on the bottom section.

These were originally a really dull orangey-grey (one of my not so great mixes) so I revived them with some more opaque and transparent oranges and a sprinkling of cream and lighter orange on top. They make me think of marmalade.

This pair were victims of the purple/lavender/green horror mix so I brightened them up with more green opaques and a budgerigar green transparent. I love the effect sprinkling opaque enamel on top of transparent gives you, it reminds me of lichen.
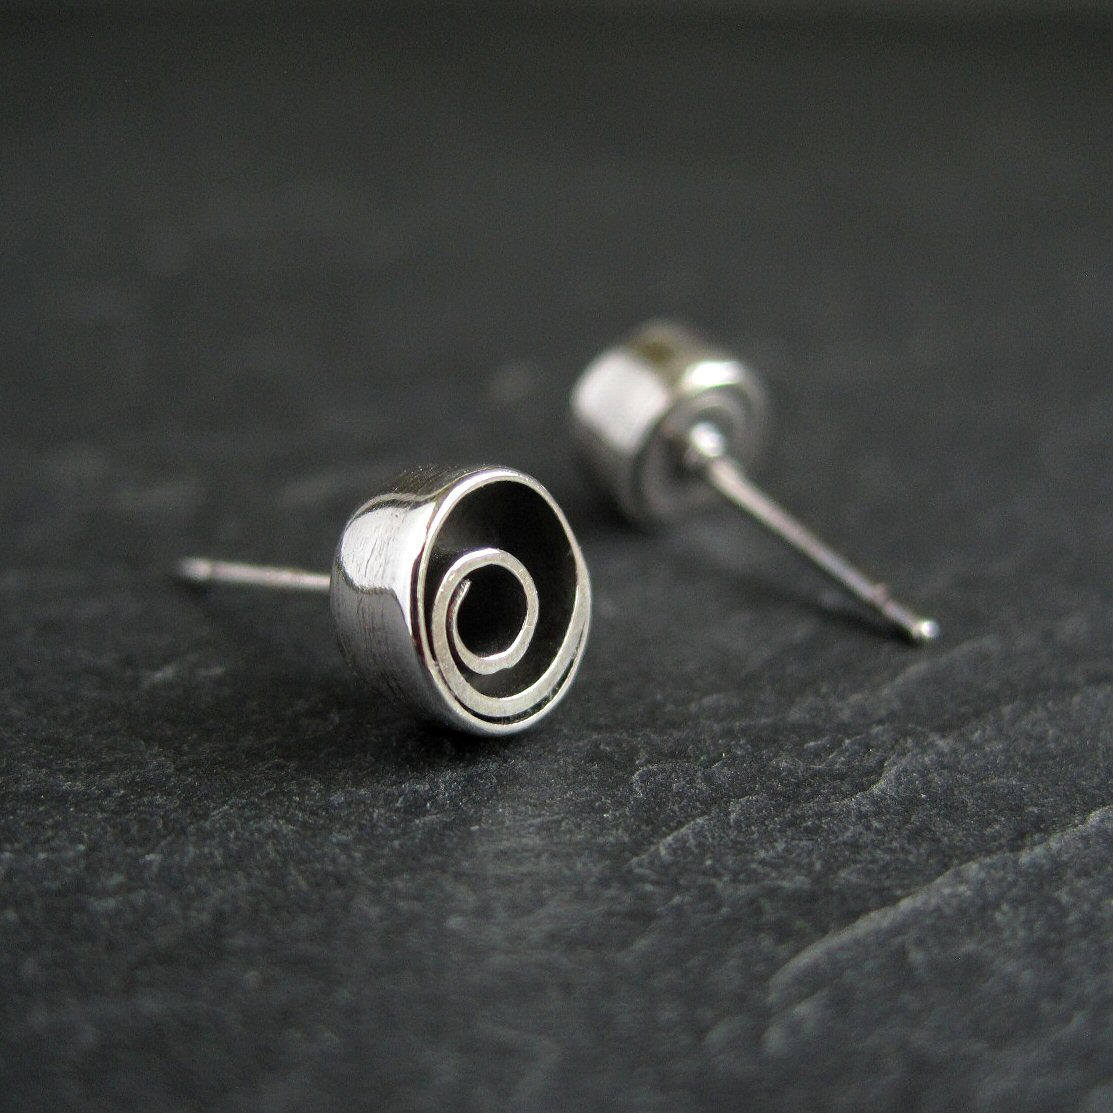
I finished off a few simple stud earrings in copper and silver this week too. I used thin strips of metal and coiled them with round nose pliers like you would make a spiral to form cute twirls. I soldered the ends then after sanding one side flat I soldered them to a base, tidied them up then added posts and oxidized them.

The copper pair remind me of chelsea buns!
The silver studs look like roses, so pretty!!
ReplyDeleteSome beautiful work! I really like the studs as well as the colorful enamels!
ReplyDeleteI love your enamel mixes. I've done some of that, but when I get too many layers, I also get cracks.
ReplyDeleteAlso, I've not yet worked with the transparent enamels. The thought of "washing" them has intimidated me. Do you wash your transparents? If so, is it as much of a pain as it sounds?
Washing transparent enamels is pretty easy really it just sounds a bit strange!
ReplyDeleteI just put a small amount into a shot glass and fill with water from the tap, stir it then leave for a couple of minutes to settle. Pour off the water and repeat until the water is "clear". I use filtered water for the last rinse but I don't think it matters that much if you are going to use it on top of opaques.
To dry the powder, spread it onto a clean piece of paper on top of a baking sheet and put in the oven at the lowest setting for 10 - 15 minutes. Just make sure everything you use is clean and free of dust to avoid getting any more bits in the enamel powder.
A bit of a faff but easy enough.
Lovely lovely jewels! Great use of wire on those earrings too ♥
ReplyDeleteI love the speckled look on the enameled piece. A neat effect! The swirl earrings are so cool.
ReplyDeleteI'm not sure what a chelsea bun is but I would guess it is what we call a cinnamon bun since that is what they remind me of. :)
Thank you!
ReplyDeleteChelsea buns are similar to cinnamon buns but with added sultanas and candied peel. I made them at school years ago!
Loving the twirly studs - such a clever design and executed to perfection! I too have recently been making studs and my jewellery tutor told me to set the posts off-centre towards the top but I'm not sure - what do you do?
ReplyDeleteKristin :)
Kirstin, your tutor probably said that as it's easier than getting the posts dead centre on a round pair. I try to get them centred and most times it works but the odd one does go a bit awry sometimes :D
ReplyDeleteLOVELY WORK.
ReplyDeleteReally great stuffs there :)
Navneet
www.navneetgems.blogspot.com
love your colours - the turquoise is exquisite!
ReplyDeleteYou mentioned that the posts sometimes go awry and not 100% in the centre - sounds good to me. Perfection is overrated and something slightly off gives it character, in my very humble opinion!
ReplyDeleteM
I agree Martin, perfection is over-rated!
ReplyDelete