
I had another play with my rolling mill last week using some of the texture sheets from Etsy shop Rolling Mill Resource. I used some sterling silver and copper sheet and soon discovered it's best to get organized before you start!

I cut the sheet to size and worked out which design was going on which piece of metal. I also tried a feather but more on that later. Most of the sheet I used was 20g/0.8mm with one piece of 18g/1.0mm and one of 22g/0.6mm.
I've read that you should do a dead pass of the metal through the rolling mill with the gap the same size as the metal and texturing item. I'm not sure what this is supposed to achieve but I don't bother doing it. Judging the correct size of gap between the rollers is a trial and error thing that you discover by setting the gap then starting to roll the metal through. If there's too much resistance you make the gap bigger until there's just enough resistance to roll the metal through without giving yourself a hernia.
Here's some photos I took of the textured metal before pickling.


A leaf skeleton using silver and copper to sandwich the leaf. This gives you two textured pieces for the price of one. The texture shows up better on the copper due to the lighter colour but the design on the silver was just as crisp.

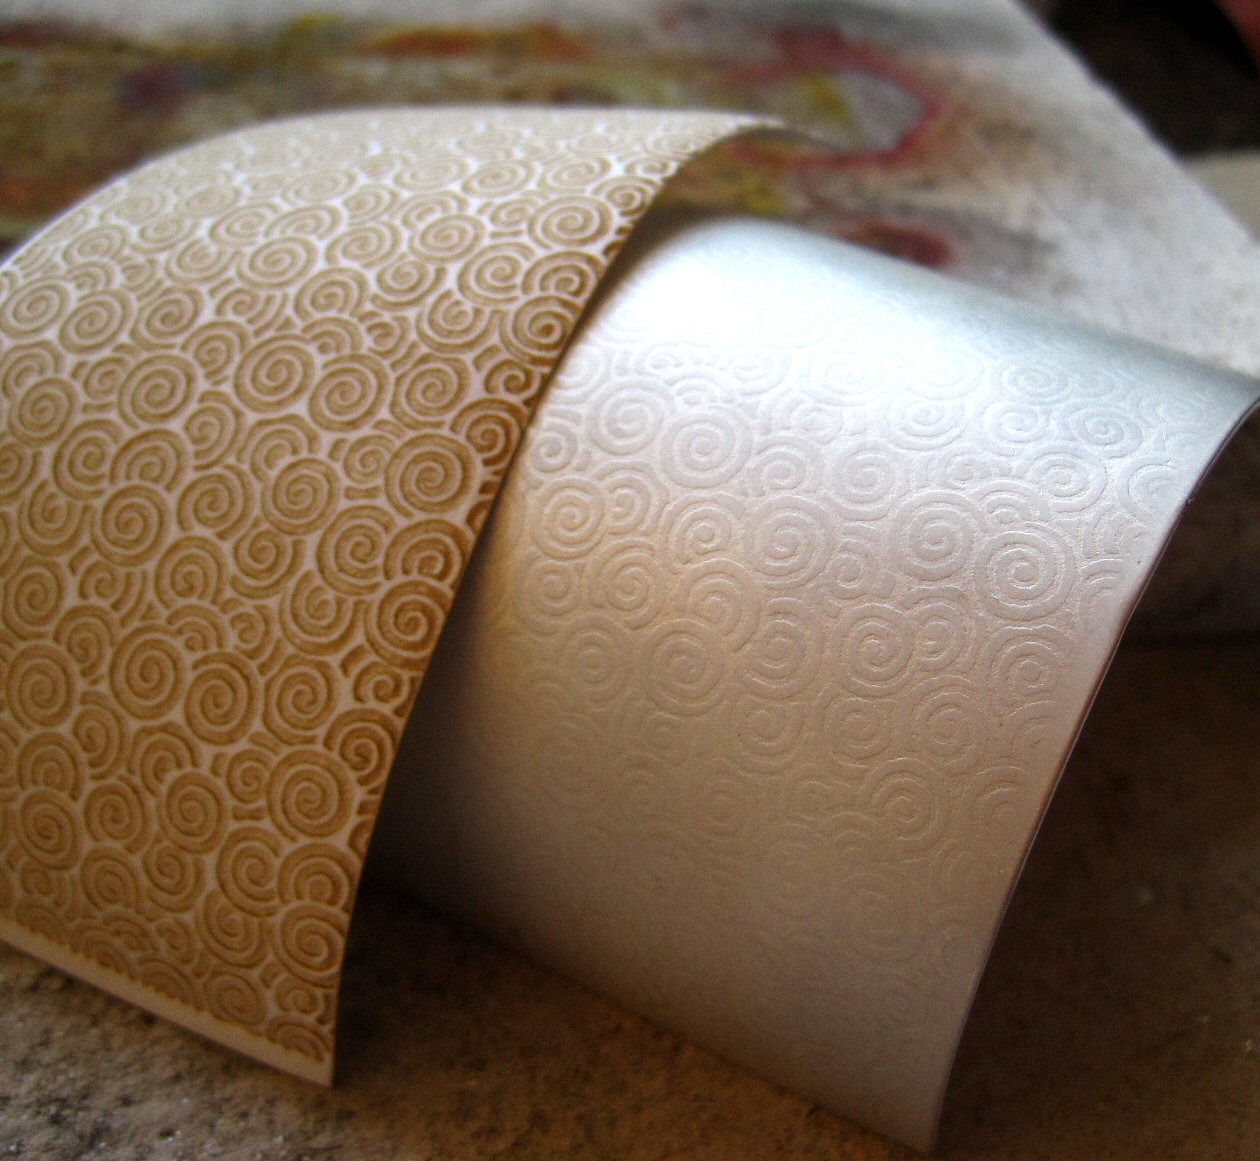
The spiral design was a freebie (thank you!) I do love spirals but didn't buy that design for precisely that (predictable) reason!


I love these two designs, they came out well and I think the one on the right on silver is the nicest one yet.


This is a nice circle and diamond design on 18g silver. It came out very clearly. The other design on 22g was fainter which may be due to the thinner metal or maybe it's just that particular design.


The designs after pickling.
The piece of copper at the back was done with a feather with not the greatest results. I had the rollers too close and really struggled to get the metal through! A lot of shoulder bracing was involved but I got it through eventually. Once the metal gets so far it becomes hard to turn the rollers either backwards or forwards so you just have to use brute force! Consequently the feather moved so I have two images. It did work but it's very fine and would show up better if the copper was oxidized but I think if I try another feather I'll use a larger one (and not have the rollers too tight!)

The pattern on this piece of copper was a bonus! I used it to sandwich the textured card to print on the silver but ended up with a nice print on the copper too from the back of the textured card. Nice one!
Most of the card patterns can be used twice which is something that surprised me. I expected them all to be flattened after the first use but most of them still had enough depth in the design to use again.
So now I have lots of textured metal to play with I had better get on with making new pieces!
Bellissimi!!! Ma hai usato una foglia vera??? Meravigliosa!!! Io non ho il laminatoio, secondo te si può provare con la macchina per la pasta da cucina?
ReplyDeleteBellissimo, bellissimo!!!
E 'solo le venature della foglia. Non sono sicuro su come utilizzare una macchina per pasta, si può lavorare su metalli sottili.
DeleteHo usato un traduttore per questo quindi se è incomprensibile mi scuso!
I love your rolled textures! It really sets the imagination off and running. You make me wish for a rolling mill too, lol!
ReplyDeleteThanks Keith!
DeleteI couldn't make my rolling mill do those prints if my life depended on it. Very nice!
ReplyDeleteOh i want a rolling mill so bad now! Which do you have?
ReplyDeleteHi Shannon, It's the Durston mini 80.
DeleteCiao!!!Fai delle cose veramente meravigliose!!!
ReplyDeleteGrazie!
DeleteOh, I do so want a rolling mill, although I fear it would them involves me buying endless sheets of silver to use in it ;) Wonderful to see the results from your experiments - I've found that even the 'mistakes' are often very beautiful...!
ReplyDeleteThese textures are gorgeous - I am excited for you and the world of possibilities you have opened up with these textures. Go Tracy go!
ReplyDeleteKristin :)
Thanks Kristin :D
DeleteI've tried the feather and leaf impressions with no luck. The leaf was fresh and no impression was made. I tried a dry leaf and it just crumbled. As far as the feather, only the middle part was impressed. What gauge metals did you use for your "sandwich"? Also, where did you find the leaf skeleton? Thanks in advance!!
ReplyDeleteThanks for your comment Jemima, I've replied to your email message :D
DeleteNeed to use a skeleton leaf. Or even buy a fake skeleton leaf from a craft store. You need to anneal your metal before you go to the rolling mill with it. Especially if you're trying to use a feather.
DeleteBeautiful Designs! You have provided great rolling Mill textures on Metal.
ReplyDelete